Pixelate filter: post-processing in a compute shader
bronson
- posted on
- 5 Comments
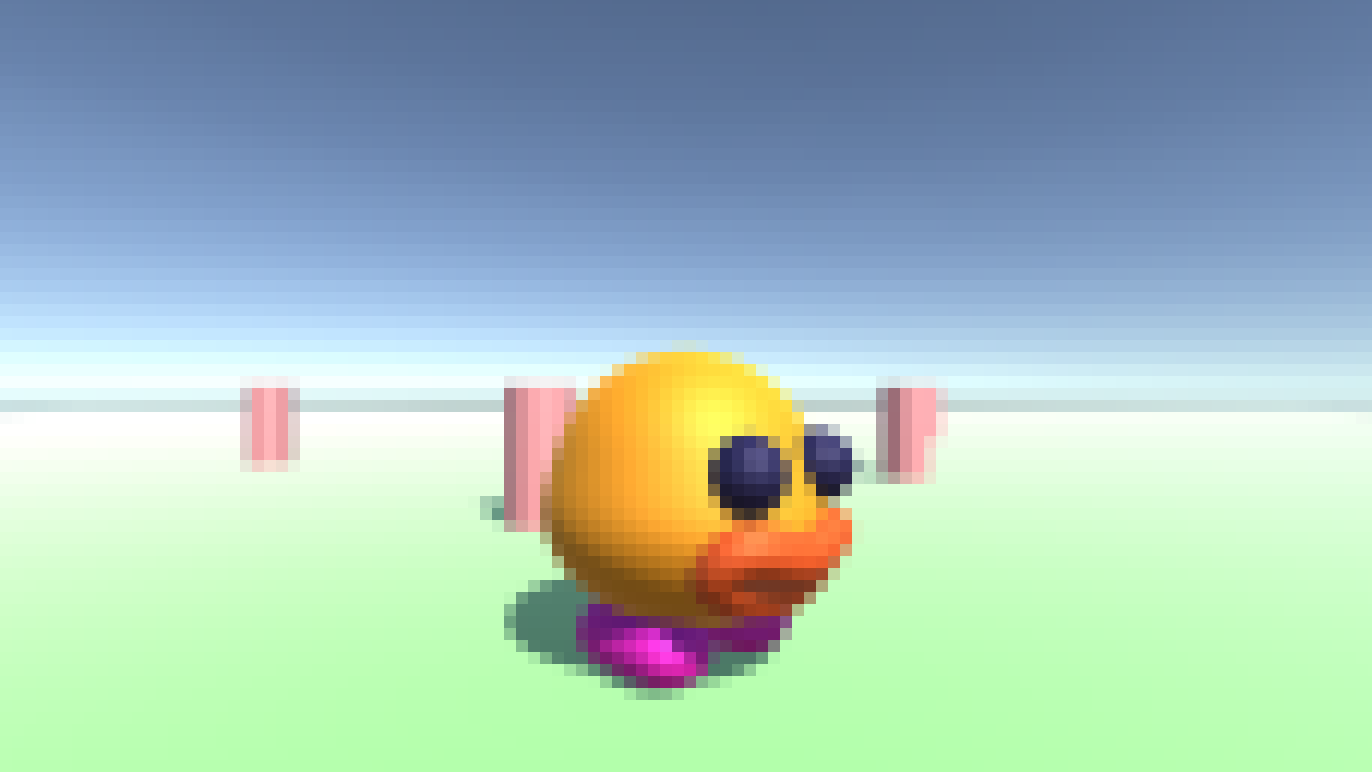
In this article, we explore post-processing by writing a pixelate filter using a compute shader.
How does post-processing work?
At its core, Post-processing, aka image processing or image filters, are a process where we take an image and modify the pixels. When it comes to games, generally, we take the image rendered by the camera and process it before outputting it to the screen. As a result, we can consider the image holistically, as opposed to inside the rendering pipeline, where we only have the information we calculated in the previous stages of the pipeline. On the other hand, we no longer have a 3d scene to work with; we only have a 2d image. As such, sometimes we’ll generate extra buffers to assist in the post-processing stage, such as a texture that contains the normal of every pixel in the final rendered image. The bottom line is that some effects are better suited to post-processing, and others fit into the rendering pipeline.
Post-processing compute shader
As far as I know, using compute shaders for post-processing is out of the ordinary. However, I find it very effective and surprisingly natural. In particular, the ability to control the number of threads is handy. For example, dispatching a thread per pixel is easy to visualize. In our case, we’ll take the average of multiple pixels and set the value back to the texture. That means we can dispatch a thread per group of pixels instead. I believe that having that control is advantageous over standard post-processing.
Pixelate filter
So, how do we write a pixelate filter? We take the average colour of a block of pixels and set those pixels to that average colour. It’s surprisingly straightforward.
We’ll dispatch one thread for each square block of pixels. So, first, we’ll convert the thread id into a pixel position. Do that by multiplying the thread id by the block size.
const float2 startPos = id.xy * _BlockSize;This gives us the first pixel in the block, the corner. To make this code work, we need to know the block size. We’ll pass that in from C# so that we can change it on the fly. Then, we iterate through all the pixels in the block, sum all the colours and divide to get the average.
float numPixels = blockWidth * blockHeight;
float4 colour = float4(0, 0, 0, 0);
for (int i = 0; i < blockWidth; ++i)
{
    for (int j = 0; j < blockHeight; ++j)
    {
        const uint2 pixelPos = uint2(startPos.x + i, startPos.y + j);
        colour += _Result[pixelPos];
    }
}
colour /= numPixels;
However, before we do this, we need to calculate the block height and width. Usually, this is as easy as taking the _BlockSize and assigning that. However, there’s a chance our block of pixels might extend past the end of the _Result texture. That’s because our _BlockSize may not fit perfectly into our _Result texture resolution. So, we’ll do a little calculation to check. By the way, the _Result texture is the final image output to the screen.
const int blockWidth = min(_BlockSize, _ResultWidth - startPos.x);
const int blockHeight = min(_BlockSize, _ResultHeight - startPos.y);
To make this work, we’ll need to know the width and height of our _Result texture, so we’ll pass that from C# as well. The equation will take the _BlockSize as the width and height unless the distance from our starting position to the end of the texture is smaller.
The final part of the shader is taking the average colour and assigning it to every pixel in our block.
for (int i = 0; i < blockWidth; ++i)
{
    for (int j = 0; j < blockHeight; ++j)
    {
        const uint2 pixelPos = uint2(startPos.x + i, startPos.y + j);
        _Result[pixelPos] = colour;
    }
}
Putting it all together, here’s what we get.
#pragma kernel Pixelate

RWTexture2D<float4> _Result;

int _BlockSize;
int _ResultWidth;
int _ResultHeight;

[numthreads(8,8,1)]
void Pixelate (uint3 id : SV_DispatchThreadID)
{
    if (id.x >= _ResultWidth || id.y >= _ResultHeight)
        return;

    const float2 startPos = id.xy * _BlockSize;

    if (startPos.x >= _ResultWidth || startPos.y >= _ResultHeight)
        return;

    const int blockWidth = min(_BlockSize, _ResultWidth - startPos.x);
    const int blockHeight = min(_BlockSize, _ResultHeight - startPos.y);
    const int numPixels = blockHeight * blockWidth;

    float4 colour = float4(0, 0, 0, 0);
    for (int i = 0; i < blockWidth; ++i)
    {
        for (int j = 0; j < blockHeight; ++j)
        {
            const uint2 pixelPos = uint2(startPos.x + i, startPos.y + j);
            colour += _Result[pixelPos];
        }
    }
    colour /= numPixels;

    for (int i = 0; i < blockWidth; ++i)
    {
        for (int j = 0; j < blockHeight; ++j)
        {
            const uint2 pixelPos = uint2(startPos.x + i, startPos.y + j);
            _Result[pixelPos] = colour;
        }
    }
}
C# Compute Shader Runner
Over on the C# side, we’re mostly throwing values over to the GPU. However, there’s one unique feature since we’re doing post-processing. We’ll take advantage of the OnRenderImage callback to get the camera’s frame buffer after rendering. We have to copy the frame buffer to a render texture with enableRandomWrite enabled. Then, we perform the image processing on that render texture before copying it to the screen. By the way, OnRenderImage only works with the built-in renderer, so this doesn’t work in URP or HDRP. To do this using the SRPs, I suspect you would write a Renderer Feature to run the compute shader after all the pipeline stages.
void OnRenderImage(RenderTexture src, RenderTexture dest)
{
    Graphics.Blit(src, _renderTexture);

    var mainKernel = PixelateComputeShader.FindKernel("Pixelate");
    PixelateComputeShader.SetInt("_BlockSize", BlockSize);
    PixelateComputeShader.SetInt("_ResultWidth", _renderTexture.width);
    PixelateComputeShader.SetInt("_ResultHeight", _renderTexture.height);
    PixelateComputeShader.SetTexture(mainKernel, "_Result", _renderTexture);
    PixelateComputeShader.GetKernelThreadGroupSizes(mainKernel, out uint xGroupSize, out uint yGroupSize, out _);
    PixelateComputeShader.Dispatch(mainKernel,
        Mathf.CeilToInt(_renderTexture.width / (float)BlockSize / xGroupSize),
        Mathf.CeilToInt(_renderTexture.height / (float)BlockSize / yGroupSize),
        1);

    Graphics.Blit(_renderTexture, dest);
}
The rest of the script creates the render texture and updates it if the screen size changes. Here’s the entire script.
using UnityEngine;

public class PixelateRunner : MonoBehaviour
{
    public ComputeShader PixelateComputeShader;
    [Range(2, 40)] public int BlockSize = 3;

    int _screenWidth;
    int _screenHeight;
    RenderTexture _renderTexture;

    void Start()
    {
        CreateRenderTexture();
    }

    void CreateRenderTexture()
    {
        _screenWidth = Screen.width;
        _screenHeight = Screen.height;

        _renderTexture = new RenderTexture(_screenWidth, _screenHeight, 24);
        _renderTexture.filterMode = FilterMode.Point;
        _renderTexture.enableRandomWrite = true;
        _renderTexture.Create();
    }

    void Update()
    {
        if (Screen.width != _screenWidth || Screen.height != _screenHeight)
            CreateRenderTexture();
    }

    void OnRenderImage(RenderTexture src, RenderTexture dest)
    {
        Graphics.Blit(src, _renderTexture);

        var mainKernel = PixelateComputeShader.FindKernel("Pixelate");
        PixelateComputeShader.SetInt("_BlockSize", BlockSize);
        PixelateComputeShader.SetInt("_ResultWidth", _renderTexture.width);
        PixelateComputeShader.SetInt("_ResultHeight", _renderTexture.height);
        PixelateComputeShader.SetTexture(mainKernel, "_Result", _renderTexture);
        PixelateComputeShader.GetKernelThreadGroupSizes(mainKernel, out uint xGroupSize, out uint yGroupSize, out _);
        PixelateComputeShader.Dispatch(mainKernel,
            Mathf.CeilToInt(_renderTexture.width / (float)BlockSize / xGroupSize),
            Mathf.CeilToInt(_renderTexture.height / (float)BlockSize / yGroupSize),
            1);

        Graphics.Blit(_renderTexture, dest);
    }
}
That’s how you set up post-processing using a compute shader. Despite the name PixelateRunner, this template could work for any post-processing-via-compute-shader situation. This example is relatively simple. We could extend this technique to create new effects, though. For example, by clamping the colours to a limited palette, we emulate different retro hardware. We could also experiment with operations other than taking the average colour, such as taking the most prominent or repeated colour in a block of pixels.
Experiment with the project here on GitHub. I’d love to hear about any variations on the effect that you create. If you find my work useful, join my mailing list, and I’ll email you whenever a new post is released.
OccaSoftware
Hi! I’d been interested to better understand the pros and cons of using a compute shader rather than a pixel shader for this use case.
bronson
Me too, frankly.
There are some I know. For example, compute shaders work on most hardware but not all, so that’s unfortunate. That said, if you’re running on hardware that doesn’t support compute shaders, it’s unlikely you’ll be able to perform a lot of post processing anyway.
I personally find compute shaders easier to work with because they’re more general purpose. Additionally, compute shaders allow you to control the number of threads. So in the post we run one thread per block of pixels, as opposed to a fragment shader, which would once on every pixel. This simplifies the algorithm considerably and may run faster because we perform less work.
That said, there may be other advantages and disadvantages that I’m unaware of.
Jan
As far as I’m aware using compute shaders for fullscreen work (post processing, ssao, stuff like that) is all the rage now. Even UE5’s Nanite system for example implements software rasterization completely in a compute shader and is faster than hardware rasterization! (in some cases.. watch the presentation :D)
Mesh shaders are another example, they are mostly just compute shaders and faster than the traditional VS/PS pipeline
Michael @ OccaSoftware
Ahh, very interesting! I hadn’t expected that there could be performance implications by using Compute in this case. Really interesting to know about Nanite as well. I’d be interested in porting some of my fullscreen effects from VS/PS to Compute Shaders to evaluate and compare performance results, especially on expensive work like volumetric rendering.
That being said, it is quite a hard sell to exclude compute-incapable hardware for asset development. I develop assets for the community. One of my assets, Auto Exposure for URP, received quite a few questions about supporting WebGL (which DOESN’T support Compute Shaders yet). And, I ended up supporting a Spanish game development company to port from Compute to the VS/PS workflow for their project that targets WebGL – which took something like 30-35 hours to get it ported and properly integrated.
I know that WebGL has a compute specification, but it’s not widely adopted yet. (https://registry.khronos.org/webgl/specs/latest/2.0-compute/). Hopefully that support continues to grow over time 🙂
Void
thank you i have been looking for compute shader to hdrp the entire day now not a lot of reading until I found this.