Mesh Deformation in Unity

In this article, I explore mesh deformation using a custom vertex shader. Andy Saia’s GDC talk on mobile effects inspired this post. If you’re interested, I linked that talk at the end of the post.
I’m a bit embarrassed to admit that I didn’t check if there was a companion project for the GDC presentation until after I wrote my version. So imagine my surprise when I found that project! Consequently, this is my recreation of the technique based on Andy’s description in the video. Let’s dive in!
How does mesh deformation work?
We define the stretch of the mesh using an anchor and a manipulator. The anchor is a transform that determines the resting position and the point from which we’re stretching. The manipulator is a transform to calculate the delta, or in other words, how much we’re pulling relative to the anchor. For example, if you stretched your cheek, the anchor is the point where you grab your cheek before pulling it, and the manipulator is the new position after pulling your cheek.
After defining these two transforms, we’ll create a transformation matrix to represent the move, scale, and rotation from the anchor to the manipulator. After we pass this matrix into the vertex shader, we can use it to displace vertices. The original project uses a sphere falloff function to determine which vertices to move. In other words, any vertices within a given distance from the anchor will move. We’ll use that same approach for now, but it would be interesting to use our voxel-based falloff from a previous post in a future update.
The last step is to recalculate new normals. If we move the vertices without recalculating the normals, we’ll see the original lighting, which is wrong. To recalculate the normals, we take a point in space along the vertex tangent and transform it with the manipulator transformation matrix. Then, we calculate the vertex binormal and do the same to that. Next, we use these new points to calculate our new tangent and binormal, which we use to calculate our final normal. I break this down into more detail further down.
Creating the transformation matrix
Create a new C# script called Manipulator.cs to start. As previously mentioned, we need an anchor and a handle to start. Additionally, we need a reference to the mesh’s renderer. Why? We’ll use the renderer to access the material and set shader variables like the transformation matrix, the anchor position, etc.
public class Manipulator : MonoBehaviour
{
    public Transform Anchor;
    public Transform Handle;
    public Renderer Renderer;

    static readonly int TransformationMatrixId = Shader.PropertyToID("_TransformationMatrix");
    static readonly int AnchorPositionId = Shader.PropertyToID("_AnchorPosition");

    void Update()
    {
        var transformationMatrix = Handle.localToWorldMatrix * Anchor.worldToLocalMatrix;

        var softbodyMaterial = Renderer.sharedMaterial;

        softbodyMaterial.SetMatrix(TransformationMatrixId, transformationMatrix);
        softbodyMaterial.SetVector(AnchorPositionId, Anchor.position);
    }
}
The transformation matrix is straightforward; it converts from the anchor’s local space into the handle’s local space. We create the matrix by multiplying the handle localToWorldMatrix by the anchor worldToLocalMatrix. Then, grab the material from the object’s renderer and set the transformation matrix and anchor position (in world space) on the shader.
“Soft body” shader
Time to write the shader. I created a surface shader because we’re focusing on the vertex shader, and I don’t want to worry about the other details. You could also use Shader Graph and write a custom vertex shader with a custom node. In the surface shader, modify the pragma statement to specify a vertex function.
#pragma surface surf Standard vertex:vert fullforwardshadows addshadowThen, add the new fields that we set from C#.
sampler2D _MainTex;
half _Glossiness;
half _Metallic;
fixed4 _Color;
float4x4 _TransformationMatrix;
float4 _AnchorPosition;
Finally, add the vertex function.
void vert(inout appdata_full v, out Input data)
{
    UNITY_INITIALIZE_OUTPUT(Input, data);

    float4 vertexPositionWS = mul(unity_ObjectToWorld, v.vertex);
    float3 manipulatedPositionWS = ApplyManipulator(vertexPositionWS, _TransformationMatrix, _AnchorPosition, 1.0, 0.1);
    v.vertex = mul(unity_WorldToObject, float4(manipulatedPositionWS, 1));
}
Of course, we haven’t written the ApplyManipulator method yet, so let’s do that. By the way, I copied this method from the GDC talk. Thanks, Andy.
float3 ApplyManipulator(float3 position, float4x4 transformationMatrix, float3 anchorPosition, float maskRadius, float maskHardness)
{
    float3 manipulatedPosition = mul(transformationMatrix, float4(position, 1)).xyz;

    const float falloff = SphereMask(position, anchorPosition, maskRadius, maskHardness);
    manipulatedPosition = lerp(position, manipulatedPosition, falloff);

    return manipulatedPosition;
}
Primarily, all we’re doing is multiplying our vertex position by the _TransformationMatrix. However, we also add a falloff based on a sphere mask. The reason is that otherwise, every single vertex would move with our manipulator, and as a result, we’d just be manipulating the entire mesh. The falloff defines a radius from the anchor position, where only vertices within that radius are affected. You’re undoubtedly wondering what the SphereMask function looks like too, so here it is.
float SphereMask(float3 position, float3 center, float radius, float hardness)
{
    return 1 - saturate((distance(position, center) - radius) / (1 - hardness));
}
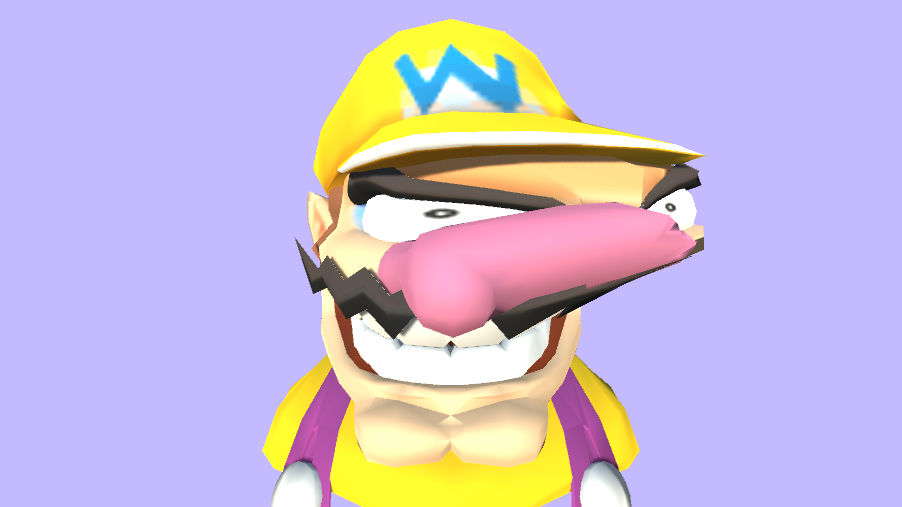
That’s all we need to start pulling stuff around. If you want to try it, create a new material with the soft body shader and attach it to an object. Then, set up a manipulator component and give it an anchor and a handle (two empty transforms will do). Finally, set the reference to the renderer with the correct material. Now, if you enter Playmode, you can drag the handle around and see the results. I recommend attaching physics springs to the handle as well to get some fun physical behaviour. I created a dripping nose that you can play with in the Github project linked at the end of the post.

As I mentioned before, the current setup doesn’t correct the normals when the vertices move, which leads to incorrect lighting. Let’s fix that next.
Fixing the lighting
We’ll calculate new normals based on the modified position of our vertices in the vertex shader. To do so, we need to understand the relationship between a vertex’s normal, tangent and binormal. A vertex normal is a direction that points away from a vertex. We compare this direction to the oncoming light direction to determine how much this part of the mesh faces the light. The more it faces the light, the more lit it is. The tangent is a direction along the surface of the mesh. The binormal is a direction that’s perpendicular to the normal and the tangent. In other words, imagine a little translation gizmo at your vertex position with the Y-axis pointing along the normal and the X-axis pointing along the tangent. In this case, the Z-axis would point along the binormal. Why does this matter? Because we’re going to use the tangent and binormal to calculate a new normal.
Let’s start by calculating a new tangent. Here’s how we do this:
- Convert the existing tangent to world space.
- Calculate a position from the vertex position to an arbitrary distance away in the tangent direction.
- Apply the manipulator to this position.
- Calculate the direction from the manipulated vertex position to the manipulated tangent position, our new tangent.
Here’s the code for that.
float3 tangentWS = UnityObjectToWorldDir(v.tangent);
float3 manipulatedTangentWS = ApplyManipulator(vertexPositionWS + tangentWS * 0.01, _TransformationMatrix, _AnchorPosition, _Radius, _Hardness);
float3 finalTangent = normalize(manipulatedTangentWS - manipulatedPositionWS);
v.tangent = float4(UnityWorldToObjectDir(finalTangent), v.tangent.w);
The process for the binormal is similar, except we have to calculate the binormal first because Unity doesn’t store it. To calculate the binormal, take the cross product of the normal and the tangent, and multiply it by the tangent’s w value. Unity stores either -1 or 1 in the tangent’s w to signify the binormal direction, which changes depending on the renderer. Otherwise, the process is the same.
float3 binormal = cross(normalize(v.normal), normalize(v.tangent.xyz)) * v.tangent.w;
float3 binormalWS = UnityObjectToWorldDir(binormal);
float3 manipulatedBinormalWS = ApplyManipulator(vertexPositionWS + binormalWS * 0.01, _TransformationMatrix, _AnchorPosition, _Radius, _Hardness);
float3 finalBinormal = normalize(manipulatedBinormalWS - manipulatedPositionWS);
The last step is to calculate the final normal. All we do is take the cross product of the manipulated tangent by the manipulated normal and multiply that by our tangent’s w component. In case you forgot, the cross product of two vectors returns a new perpendicular vector.
float3 finalNormal = normalize(cross(finalTangent, finalBinormal)) * v.tangent.w;
v.normal = UnityWorldToObjectDir(finalNormal);
Put it all together for the final vertex function.
void vert(inout appdata_full v, out Input data)
{
    UNITY_INITIALIZE_OUTPUT(Input, data);

    float4 vertexPositionWS = mul(unity_ObjectToWorld, v.vertex);
    float3 manipulatedPositionWS = ApplyManipulator(vertexPositionWS, _TransformationMatrix, _AnchorPosition, _Radius, _Hardness);
    v.vertex = mul(unity_WorldToObject, float4(manipulatedPositionWS, 1));

    float3 tangentWS = UnityObjectToWorldDir(v.tangent);
    float3 manipulatedTangentWS = ApplyManipulator(vertexPositionWS + tangentWS * 0.01, _TransformationMatrix, _AnchorPosition, _Radius, _Hardness);
    float3 finalTangent = normalize(manipulatedTangentWS - manipulatedPositionWS);
    v.tangent = float4(UnityWorldToObjectDir(finalTangent), v.tangent.w);

    float3 binormal = cross(normalize(v.normal), normalize(v.tangent.xyz)) * v.tangent.w;
    float3 binormalWS = UnityObjectToWorldDir(binormal);
    float3 manipulatedBinormalWS = ApplyManipulator(vertexPositionWS + binormalWS * 0.01, _TransformationMatrix, _AnchorPosition, _Radius, _Hardness);
    float3 finalBinormal = normalize(manipulatedBinormalWS - manipulatedPositionWS);
    float3 finalNormal = normalize(cross(finalTangent, finalBinormal)) * v.tangent.w;
    v.normal = UnityWorldToObjectDir(finalNormal);
}
If you wanted to use Shader Graph, you could convert this code block into a custom node or subgraph. With that sorted, we can play with the new squishy meshes.
Adding Mouse Control
I created a new script called ManipulatorMouseControl.cs and added it to the camera in my scene. In this script, on mouse click, we raycast from the camera into the scene. If we hit an object and that object has a Renderer with our custom material, we can manipulate it. So then, create a new manipulator and two new transforms, the anchor and the handle. Place both of the new transforms at the raycast hit point, and assign the handle, anchor and renderer in the newly created manipulator. At this point, we drag the handle around as we move the mouse.

Admittedly this system is simplistic, but it demonstrates interactivity. If I had more time, I would add interactable springs and other physics joints.
public class ManipulatorMouseControl : MonoBehaviour
{
    public Camera Camera;
    public float Radius = 1f;
    [Range(0, 1)] public float Hardness = 0.1f;

    Manipulator _manipulator;
    GameObject _manipulatorAnchor;
    GameObject _manipulatorHandle;

    Vector3 _prevMousePosition;

    bool _dragging;

    void Update()
    {
        if (Input.GetMouseButtonDown(0))
        {
            var ray = Camera.ScreenPointToRay(Input.mousePosition);

            if (Physics.Raycast(ray, out RaycastHit hit, 100f))
            {
                var hitRenderer = hit.collider.GetComponentInChildren<Renderer>();
                if (hitRenderer != null)
                {
                    _manipulator = gameObject.AddComponent<Manipulator>();
                    _manipulatorAnchor = new GameObject("MouseAnchor");
                    _manipulatorAnchor.transform.position = hit.point;

                    _manipulatorHandle = new GameObject("MouseHandle");
                    _manipulatorHandle.transform.position = _manipulatorAnchor.transform.position;

                    _manipulator.Anchor = _manipulatorAnchor.transform;
                    _manipulator.Handle = _manipulatorHandle.transform;
                    _manipulator.Renderer = hitRenderer;
                    _manipulator.Hardness = Hardness;
                    _manipulator.Radius = Radius;

                    _prevMousePosition = Input.mousePosition;
                    _dragging = true;
                }
            }
        }
        else if (_dragging && Input.GetMouseButton(0))
        {
            var mouseDelta = Input.mousePosition - _prevMousePosition;
            _manipulatorHandle.transform.Translate(mouseDelta * 0.01f);
            _prevMousePosition = Input.mousePosition;
        }
        else if (Input.GetMouseButtonUp(0))
        {
            if (_dragging)
            {
                Destroy(_manipulator);
                Destroy(_manipulatorAnchor);
                Destroy(_manipulatorHandle);
            }

            _dragging = false;
        }
    }
}
Closing Thoughts
That wraps up this experiment. Initially, I wondered if this was useful because you could achieve the same results by manipulating bones on a skinned mesh. However, this system allows us to define bone-like behaviour at runtime, which opens the door for new types of interactivity. Additionally, I think we could turn this into a simple sculpting tool with a bit more work. But let’s save that for a future project.
Play with the project here on GitHub. Check out the inspiration for this post, Andy Saia’s GDC presentation, here. If you appreciate my work, why not join my mailing list? If you do, I’ll notify you whenever I release a new post.
Patrick Reece
Nice article!
Why do you multiply the normal by the tangent.w? Is it in case it is negative?
When it comes to calculating the normal, can’t you use the inverse transpose of the matrix multiplied by the original normal, rather than recalculating it with the cross product? https://stackoverflow.com/questions/13654401/why-transforming-normals-with-the-transpose-of-the-inverse-of-the-modelview-matr
bronson
Thanks!
As for the tangent.w, Unity’s rendering pipeline stores either 1.0 or -1.0 in the tangent.w to account for the difference in direction between different rendering APIs. As far as I understand it, it’s because textures are stored from bottom-to-top in OpenGL, top-to-bottom in DirectX (I’m not sure about Vulkan and Metal). But at the same time this same value tells us the cross direction of the binormal. As it turns out, those two concepts are intertwined, so that’s why we use it. I didn’t think to check until now, but in theory if you remove that multiplication and switch between the OpenGL and DirectX renderers, the lighting should be all messed up in one of those.
As for calculating the normals, I think that would work? But I haven’t tried it so I can’t answer confidently 😅.
Mark
Very practical teaching!
I tried to get the example from GitHub and test the mesh effect, but it doesn’t seem to work, I guess there have some problem with my settings. May i ask you about the detailed settings in Unity? (about Wario’s Inspector).
bronson
Yes for sure! It works for me unchanged from what’s on GitHub though, so I wonder if there’s a bug? Or perhaps a platform issue? What platform are you running on?
As for my version, I have a ManipulatorMouseControl component on my Main Camera with the Radius set to 1 and Hardness set to 0.1. Wario himself has a MeshCollider (to detect the ray casts from the Mouse Control). And of course, Wario needs to have the Custom/SoftbodyDeformStandard shader on his material.
Anna
Any small example with hitting another object? For example for vehicle destruction? Just can’t understand how to use without mouse.
bronson
Building a comprehensive vehicle destruction system is a fairly involved process and I’m not sure if I’m really the best person to do it. That said, if you’re making a simple example, when two objects collide you can access the collision data from
();();
OnCollisionEnter. From here you can get the contact point, which is where you would place the manipulator anchor. Then, you can offset the manipulator handle by some amount based on the the velocity of the collision. I have no idea if this code works, I haven’t tested it, I just copied from theManipulatorMouseControlscript and modified it, but what I’m describing would probably look something like this:void OnCollisionEnter(Collision other)
{
var hitRenderer = other.gameObject.GetComponentInChildren
if (hitRenderer != null)
{
_manipulator = gameObject.AddComponent
_manipulatorAnchor = new GameObject("CollisionAnchor");
var contact = other.GetContact(0);
_manipulatorAnchor.transform.position = contact.point;
_manipulatorHandle = new GameObject("CollisionHandle");
_manipulatorHandle.transform.position = _manipulatorAnchor.transform.position + other.relativeVelocity;
_manipulator.Anchor = _manipulatorAnchor.transform;
_manipulator.Handle = _manipulatorHandle.transform;
_manipulator.Renderer = hitRenderer;
_manipulator.Hardness = Hardness;
_manipulator.Radius = Radius;
}
}
Like I mentioned, to make a fully-featured vehicle destruction system is a lot more work than this I believe. You’d likely have to support multiple Manipulators per-object. I’m not sure what else to be honest because I’ve never worked on a project that needed one.
Good luck! Let me know if this helps!