Pseudo-metaballs with Scriptable Renderer Features in Unity’s URP
This article shows my approach to drawing Metaballs in an optimized way using Unity, the Universal Render Pipeline (URP) and Scriptable Renderer Features.
So, the overall approach is to draw our Metaball objects to a RenderTexture, blur them, apply a Smoothstep, and draw them to the screen. The optimization is that our Metaball objects will be standard sphere meshes. I developed this technique while working on a Splatoon-like ink system for the Mix and Jam YouTube channel. That video describes the approach visually by using Photoshop, so I encourage you to check it out. The video is linked later in this post. To do all this, we’re going to use a Scriptable Renderer Feature, so let me explain how they work.
Scriptable Renderer Features
Scriptable Renderer Features are part of Unity’s Universal Render Pipeline. They allow you to augment the existing render pipeline with custom features. In this context, a feature is a collection of render passes. So every Scriptable Renderer Feature comes with at least one Scriptable Render Pass. I found this confusing at first, so I’ll repeat: Scriptable Renderer Features contain one or more Scriptable Render Passes.
A Scriptable Render Feature has two main methods: Create and AddRenderPasses. Create is where you initialize your Scriptable Render Passes, and AddRenderPasses is where you add them to the render queue. Additionally, if you want to expose values in the Inspector, the Scriptable Renderer Feature is the place to do it. A stripped-down Scriptable Renderer Feature looks like this:
CustomRenderPass m_ScriptablePass;

public override void Create()
{
    m_ScriptablePass = new CustomRenderPass();
    m_ScriptablePass.renderPassEvent = RenderPassEvent.AfterRenderingOpaques;
}

public override void AddRenderPasses(ScriptableRenderer renderer, ref RenderingData renderingData)
{
    renderer.EnqueuePass(m_ScriptablePass);
}
It’s not a lot of code because the real meat is in the Scriptable Render Passes. Scriptable Render Passes are where you provide instructions to the Rendering Pipeline, so let’s look at that next.
Scriptable Render Passes
A barebones Scriptable Render Pass contains three methods: OnCameraSetup, Execute, and OnCameraCleanup. As you may have guessed, OnCameraSetup is where you set up the render pass, Execute contains the rendering logic, and OnCameraCleanup is where you clean up any resources. In a simple example, you’d set up your render targets, draw into them, and release them at the end. We perform most of the work using Command Buffers. A Command Buffer is a Unity class that holds a list of rendering commands.
Now I have to be honest, the documentation on Scriptable Render Passes is sparse. I examined URP’s code and example code to learn enough to write my solution, but there are still certain aspects I can’t explain. For example, the documentation recommends calling ConfigureTarget on your render targets inside the Configure function instead of using the Command Buffer command SetRenderTarget. However, it doesn’t explain what to do if you have to ping pong between multiple render targets like you would when blurring. In the official UniversalRenderingExamples Github repository, there’s an example blur in which ConfigureTarget is called twice: once for each temporary render target. Upon inspecting the ConfigureTarget code, it looks like calling it a second time will invalidate any state changes made by calling it the first time. So is this the correct way to do it? Who knows. Then there’s the issue of resource clean-up. Calling ConfigureTarget ensures that your render textures are automatically cleaned up. However, given that calling ConfigureTarget a second time invalidates the reference to the first render target, I believe it’s safe to assume it won’t be able to clean it up either. Finally, there’s a Blit function that also changes the current render target. However, it’s unclear whether this also invalidates the reference to the render target set through ConfigureTarget. So my point is that I tried my best to reach a working solution. If you can provide answers or feedback, please do it. Seriously, I’m begging you.
Anyway, let’s start on our pseudo-metaballs.
Pseudo-Metaballs
As mentioned, the approach is:
- Draw regular mesh particles to a render texture.
- Blur them.
- Smoothstep the color.
- Draw the render texture to the screen.
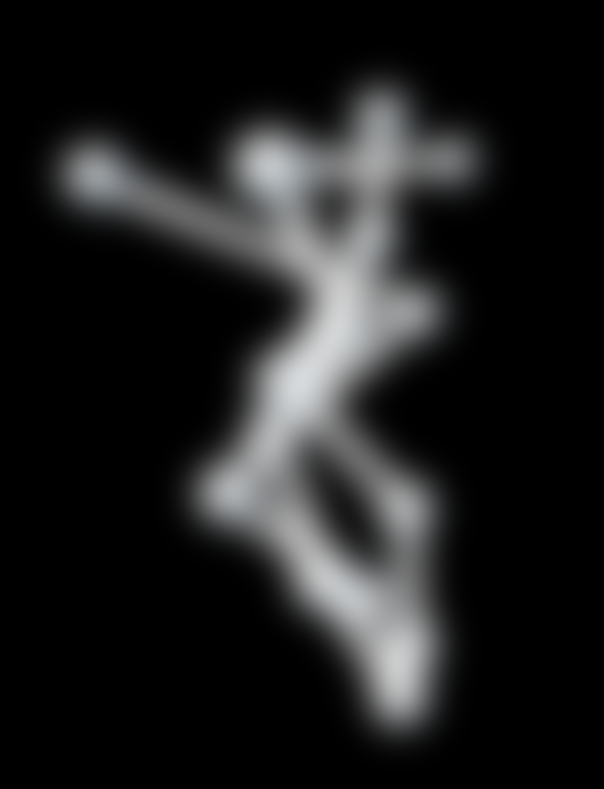
If we do this is Photoshop it looks like this:
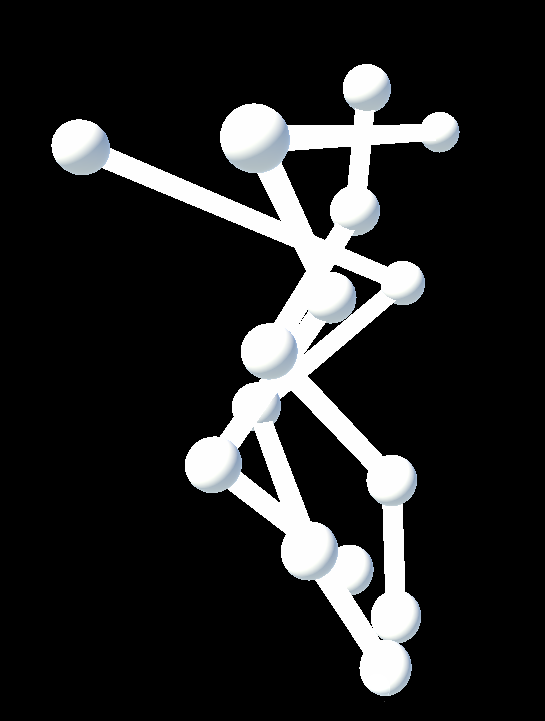

So, let’s start drawing the particles. URP has a built-in Renderer Feature to render objects. Unfortunately, it doesn’t support rendering to a custom render target. However, we can still use the code to write a version that does. At the core of the built-in RenderObjectsPass is the method ScriptableRenderContext.DrawRenderers. This method does what it sounds like: it renders stuff. Most of the code I’m about to share is boilerplate setting the state so that DrawRenderers knows what to render. Later I’ll share the entire RenderObjectsCustomRenderTarget file, but first, I’ll break it down. Let’s analyze the Execute method of the RenderObjectsPass (where the rendering happens):
public override void Execute(ScriptableRenderContext context, ref RenderingData renderingData)
{
    SortingCriteria sortingCriteria = SortingCriteria.CommonOpaque;
    DrawingSettings drawingSettings =
        CreateDrawingSettings(_shaderTagIds, ref renderingData, sortingCriteria);

    CommandBuffer cmd = CommandBufferPool.Get();
    using (new ProfilingScope(cmd, _profilingSampler))
    {
        context.DrawRenderers(renderingData.cullResults, ref drawingSettings, ref _filteringSettings,
            ref _renderStateBlock);
    }

    context.ExecuteCommandBuffer(cmd);
    cmd.Clear();
    CommandBufferPool.Release(cmd);
}
Like I mentioned before, we set up the state of our renderer and call DrawRenderers. So let’s work our way backwards. DrawRenderers takes the results of our culling step, some drawing settings, some filtering settings, and a RenderStateBlock. Let’s break down each of these arguments.
Cull results are part of the renderingData, which is automatically passed into the Execute method. The cull results are essentially the renderers left after removing those that are offscreen. Drawing settings take a list of ShaderTagIds, RenderingData and SortingCriteria. ShaderTagIds filter our which shader passes to run; we’ll set that up later. SortingCriteria determines how to sort the renderers. There are several options, but for simplicity, we use CommonOpaque. This setting will sort our objects in the way typical to other opaque things. That means if you use a transparent material, it’s going to look funny. Next, we have the FilteringSettings and RenderStateBlock. We’ll set up the ShaderTagIds, FilteringSettings and RenderStateBlock in our pass’ constructor because we only need to do it once. The rest of Execute is straightforward. We request a CommandBuffer, set up our Profiling Scope (this allows us to see our pass in the profiler), execute our command buffer and finally release it.
So now for the constructor.
public RenderObjectsPass(string profilerTag, int renderTargetId, LayerMask layerMask)
{
    _profilingSampler = new ProfilingSampler(profilerTag);
    _renderTargetId = renderTargetId;

    _filteringSettings = new FilteringSettings(null, layerMask);

    _shaderTagIds.Add(new ShaderTagId("SRPDefaultUnlit"));
    _shaderTagIds.Add(new ShaderTagId("UniversalForward"));
    _shaderTagIds.Add(new ShaderTagId("UniversalForwardOnly"));
    _shaderTagIds.Add(new ShaderTagId("LightweightForward"));

    _renderStateBlock = new RenderStateBlock(RenderStateMask.Nothing);
}
Let’s work through this. We pass a layer mask to the filtering settings, so the DrawRenderers method will only draw a given layer’s objects. As for ShaderTagIds, we add all the default URP tags. In other words, we won’t filter out any shader passes. And finally, set the RenderStateBlock to a default value of Nothing. The RenderStateBlock allows you to override parts of the render state (such as BlendState, DepthState, etc.) with your own values.
Now we’ll look at the OnCameraSetup function.
public override void OnCameraSetup(CommandBuffer cmd, ref RenderingData renderingData)
{
    RenderTextureDescriptor blitTargetDescriptor = renderingData.cameraData.cameraTargetDescriptor;
    cmd.GetTemporaryRT(_renderTargetId, blitTargetDescriptor);
    _renderTargetIdentifier = new RenderTargetIdentifier(_renderTargetId);
    ConfigureTarget(_renderTargetIdentifier);
    ConfigureClear(ClearFlag.All, Color.clear);
}
The purpose of this method is to get a RenderTexture and set it as our render target. So, we copy the camera’s RenderTextureDescriptor, request a RenderTexture with a given id and descriptor, and set it as our target. This includes, for example, information like pixel format, number of depth buffer bits, width and height, etc.
That was a lot of code to go over! The ScriptableRendererFeature is much smaller:
const string PassTag = "RenderObjectsCustomRenderTarget";
[SerializeField] string _renderTargetId;
[SerializeField] LayerMask _layerMask;
public override void Create()
{
int renderTargetId = Shader.PropertyToID(_renderTargetId);
_renderObjectsPass = new RenderObjectsPass(PassTag, renderTargetId, _layerMask);
}
public override void AddRenderPasses(ScriptableRenderer renderer, ref RenderingData renderingData)
{
renderer.EnqueuePass(_renderObjectsPass);
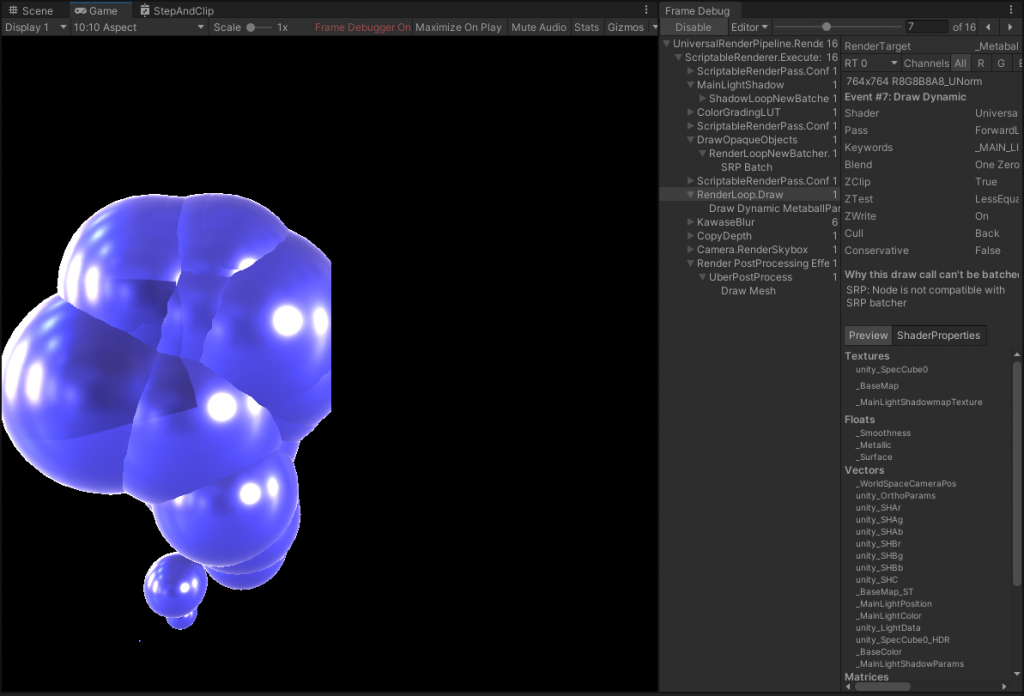
}All we do is pass values from the Inspector into our render pass and enqueue that pass. Putting it all together, we have a barebones renderer feature that draws objects of a given layer into a custom render target. If you add this renderer feature to your URP Renderer asset, you can verify the result in the frame debugger. It looks like this:
By the way, my URP Renderer Asset is set up like this, but it would probably be easier for you to inspect it in the completed project:
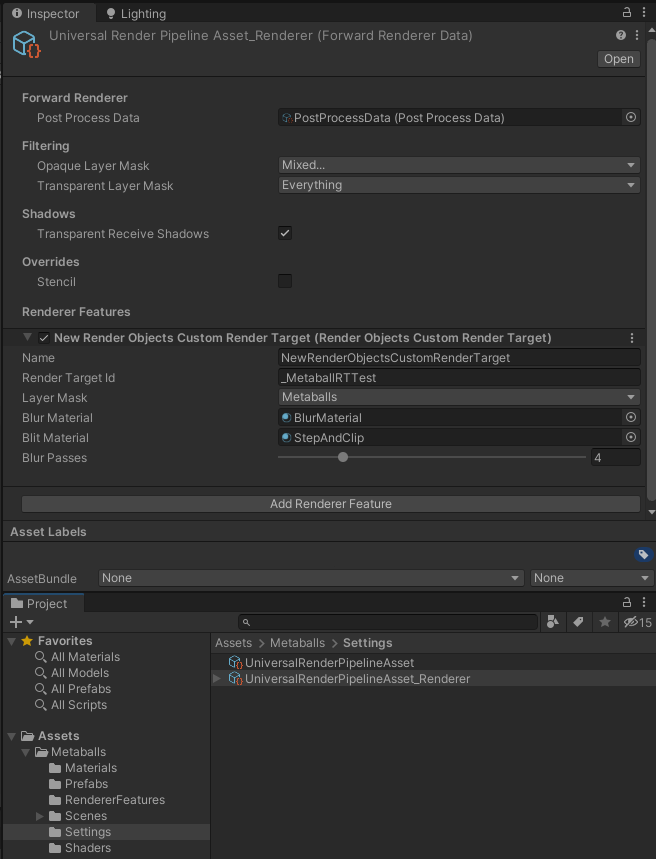
I’ll briefly go over my particle system. This approach’s strength is it works for any standard meshes, so to demonstrate, I created a simple particle system that renders sphere meshes. It has a standard URP Lit Material, and it exists on its own layer. I disabled that layer in the URP Renderer asset Layer Mask and assigned it to our Renderer Feature.
At this point, we still haven’t covered the blur pass or drawing our RenderTexture back to the screen. However, we’ve done a lot. So rather than try to cram everything into one post, I’ve saved the blur pass for next time. I’ve posted the entire project (blur pass included) on Github for you to explore, and linked it at the end of the post.
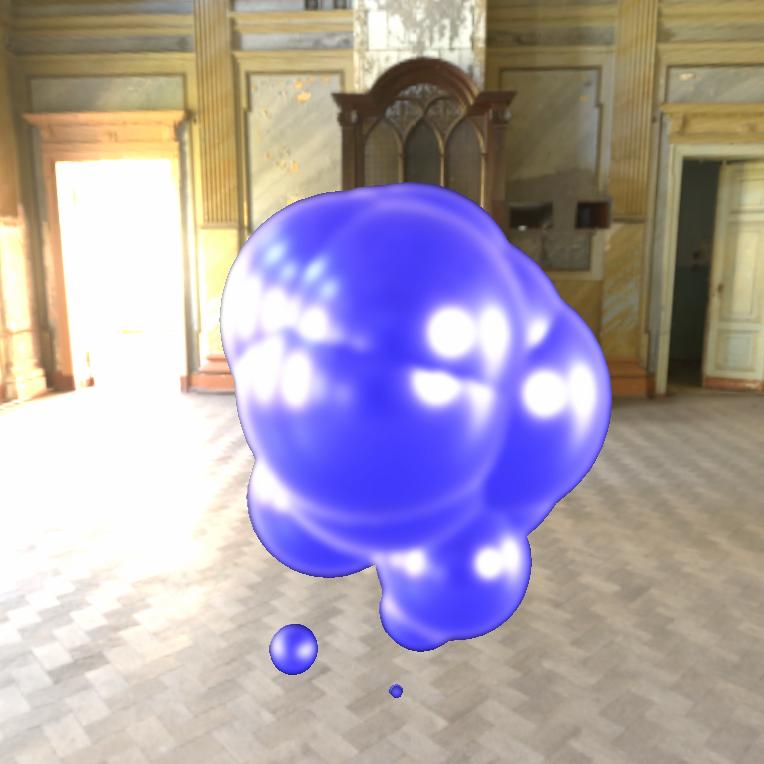
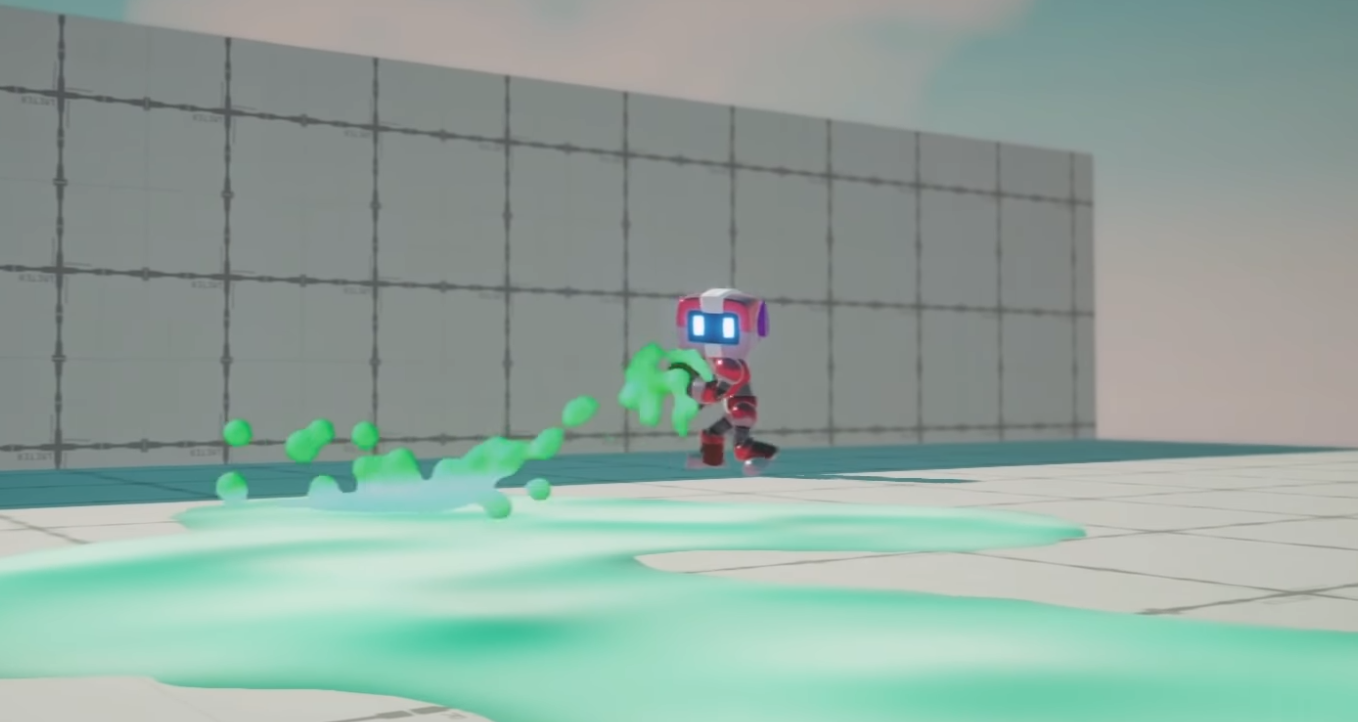
The final result is admittedly not as lovely as the real Metaballs from the previous series. However, in the context of a game, it can fit in well. Plus, we can now have a lot more of them without killing performance. If you want to see that, check out the Splatoon Ink System video linked at the bottom.
If you appreciate my blog, consider signing up to my mailing list here; so you never miss a post. The complete project is available here on Github. If you want to see this approach in action, check out this Mix And Jam video on Splatoon’s Ink System.
Jay Raval
hello sir, i have found your website from mix and jam splatoon video. i am trying to make a mobile game like splatoon for education purpose and it seems that black screen appears on android device. can you please help me on this ? i don’t know much about shaders. any help will be appreciated. thank you in advance.